Your cart is currently empty!
How to Set-Up Your Online Store
Step 1 : Register Your Account
Creating a Vendor account through My Community Made is very fast and easy.
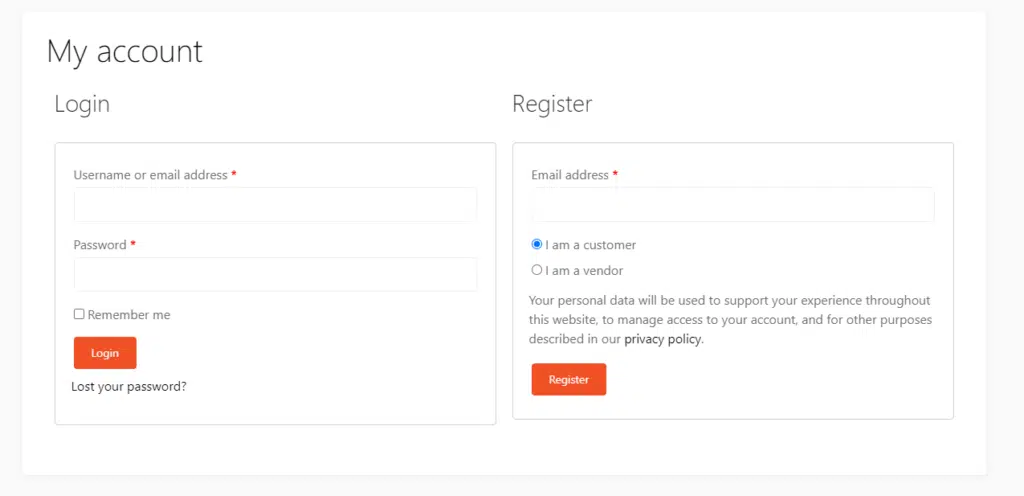
If you are on our homepage, you will see the large red button that says, “Start Selling in 5 Minutes”.
Clicking this will take you to the account signup page.

If you plan on selling on our platform you will want to select the “I am a Vendor” option.
A new form will appear asking you for some information like your Store Name, Your Preferred Store URL and your Phone Number.
You will Also See a List of Subscriptions you can choose from to start your store. Currently these are identical subscription plans with varying term lengths. All accounts currently cost $5 a month and come with everything listed in our Features.
Step 2 : Fill Out Your Basic Store Info
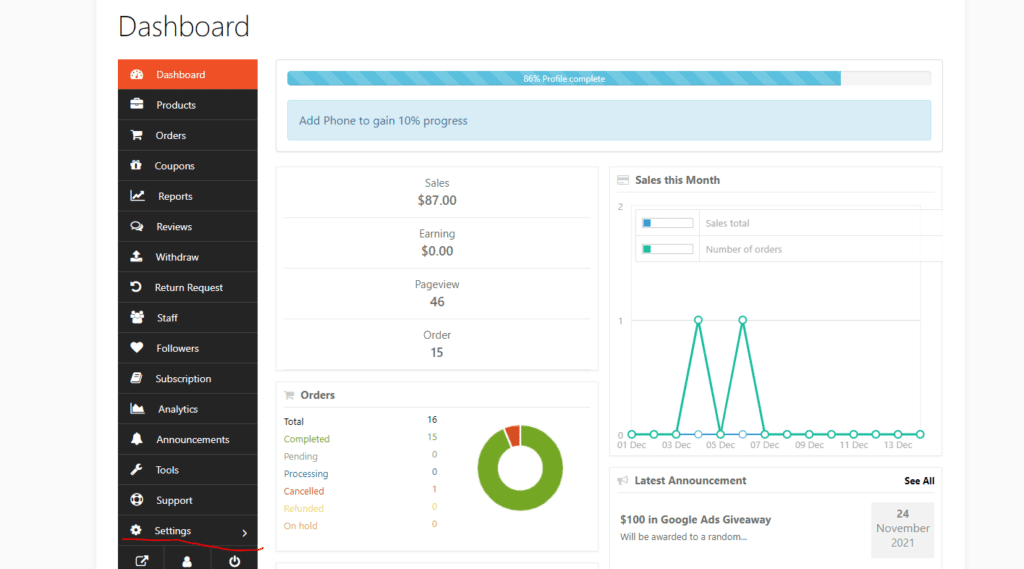
After signing up you will be given access to the Store Dashboard. The first thing you want to do is go to Settings at the bottom of the Vendor Dashboard.

Set Your Store Cover and Profile Photo
These Images are critical for getting My Community Made visitors to your store. Once set, the images will appear on both your store page, and on the product and store search pages on the site. You want to ensure your cover photo is engaging and interesting so you stand out from other vendors that may be selling in your area.

Fill In Your Store Name, Categories, Address and Contact Info

Your Store name is used to generate your store URL, for example, Fisher Tech Solutions LLC as a store-name will generate the url: https://mycommunitymade.com/store/fisher-tech-solutions-llc
While you can change you Store Name at any time, you will not be able to change this url after your store is created!
Regarding Store Categories
Store Categories should reflect the product or service your business specializes in. While you can definitely sell products outside of your store category, businesses whose store category matches their products will receive better chances of their products being found.
If the available categories on My Community Made do not cover your specific business, feel free to reach out to me via email at efisher@fishertechsolutions.com and I will add the appropriate store category to the site!
The setting, “Store Products Per Page” describes how many products your store page will display on each page. There is no need to set this number high enough to display all of your products on a single page. Your store page will allow customers to flip through the remaining items in your catalogue beyond the Product Per Page limit you’ve set!
The Setting “More Products”, refers to whether or not you wish to show a “More Products” tab on your single product page. As shown below, when the More Products tab is active, similar items from your store will be displayed within this tab, allowing the customer to look for similar items available from you. This tab will not display items from other sellers.
Add Your Google Maps Location, Terms and Conditions Page, Store Open Times and Biography
The Google Maps address displayed on this tab, will let you set the public address of your store where you typically do business. This address is used for handling the calculations for product and store search by Geolocation. Additionally, it will provide customers with an easy way to find your business. While you don’t need to fill out this field to use My Community Made, doing so will give you an incredible advantage.
If you have specific Terms and Conditions that you would like to display to your customer, you will want to click the “Terms and Conditions Setting”. Doing so will open a WYSIWYG field where you can enter your specific Terms and Conditions!
If you have a physical location and don’t work 24 hours a day, be sure to add your store opening and closing times as well! Your store and it’s products will still show up on product/store search after hours, but a small “closed” icon will show to signal to the customer that you may not be available at your location.
In between the Store Time settings and the Biography you’ll notice the “storewide discount” setting. Enable this when you would like a blanket discount added to all products on your store!
Finally, below the discount setting you have the Biography. This field allows you to tell the customer a bit about you and your store. You can add images, links and text here to really give your customer a solid impression of what you do!

Fill Out Support/Live Chat Info (If Applicable)
While we call this section, “Enable Support”, you’ll notice that it’s just a general contact form that can be used for customers to communicate directly with the business owner. You can use this button to give customers a way to contact you if something goes wrong with their product, but you can also change the text of the button to something like “Book Now”, and use the contact form as a way for your customers to schedule appointments for services!
Below the Support Text, you’ll notice the “Enable Live Chat” option. You’ll want to select this if you’d like customers to be able to quickly contact you with any questions they have. To add this feature you will need to retrieve your Facebook Page ID, and enter it in the text field. You can find this by following these instructions here: https://www.facebook.com/help/1503421039731588
You may also need to add your Store Domain to your Messenger plugin options from the Facebook Business Console. Of course, if you run into any problems just reach out to me at efisher@fishertechsolutions.com

That’s It!
Once you’ve gone through the Settings page your store is ready to start attracting customers!